How to Log into ServiceNow and Create a Ticket
Watch the Video Walkthrough:
New to ServiceNow? Watch this brief, 3-minute video guide to learn how to log into the portal, navigate the system, and successfully submit an IT support ticket.
Prefer written steps?
Follow this step-by-step guide to access system support and log your issues efficiently.
Navigate to the CUNY IT Help Portal
First, open your preferred web browser and go to the official portal landing page. Subsequently, locate and click the “Log in” link situated in the top right corner of the screen.
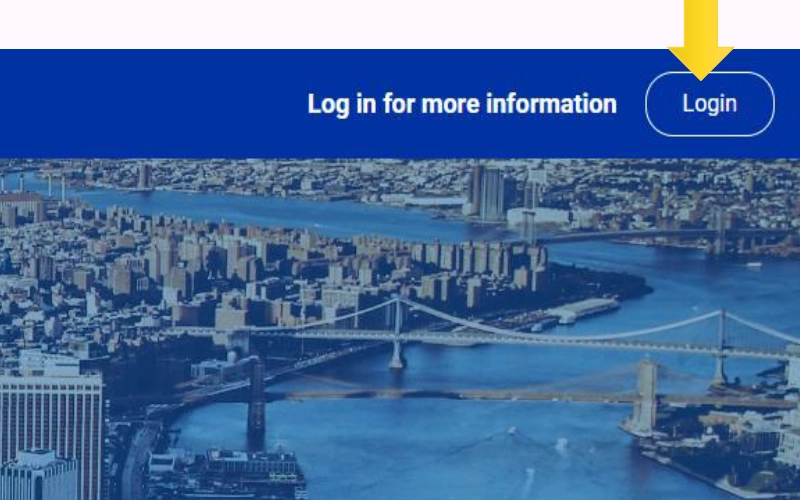 [Screenshot: Portal Homepage with Login Button Highlighted]
Enter Credentials and Authenticate
Next, provide your standard CUNY Login credentials on the single sign-on page. Because protecting institutional privacy remains a top priority, you must also complete the required Multi-Factor Authentication (MFA) step to prevent unauthorized system access.
 [Screenshot: CUNY Login Screen with Username and Password fields]
Access the Medgar Evers College Catalog
After the system authenticates your login, click the “Catalog” option located in the top navigation bar. Then, navigate to the sidebar menu, find the Categories block, and expand the specific Medgar Evers College segment.
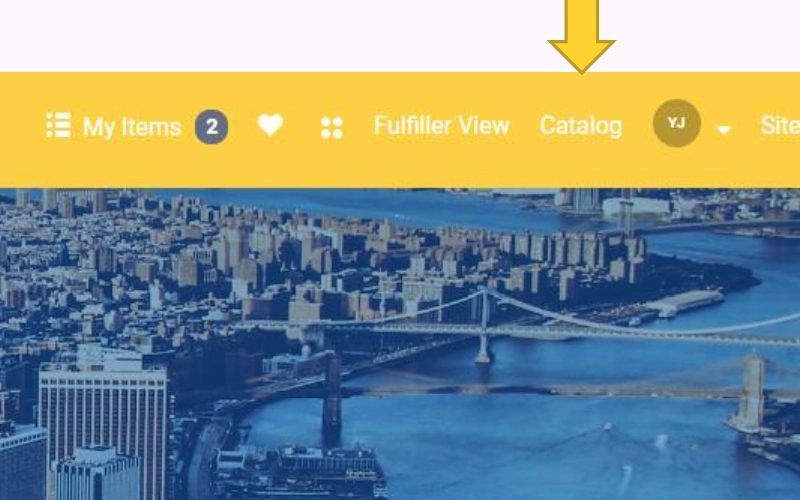
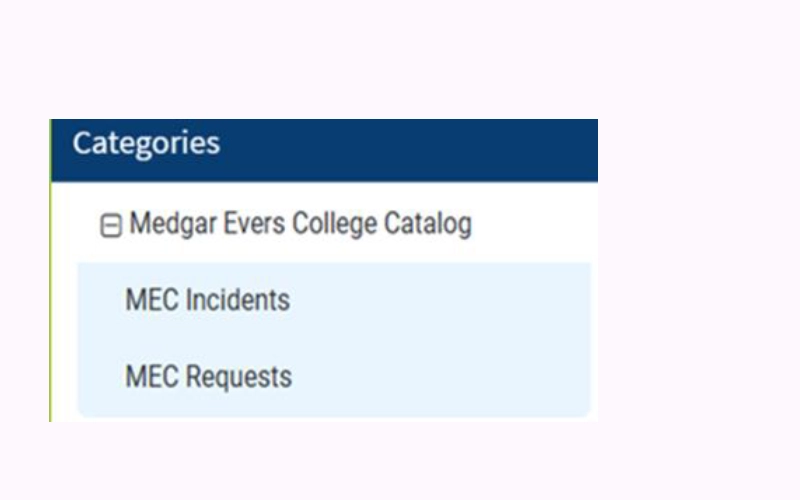 [Screenshot: Catalog View showing MEC Incidents and MEC Requests]
Choose Between Incidents and Requests
You must select the entry path that matches your technical scenario. Making an accurate choice ensures the IT Help Desk handles your ticket swiftly.
MEC Incidents
Select this option if you need to report a technical breakdown or malfunction.
- Your computer will not power on
- You cannot send or receive campus emails
- Local network printers fail to respond
MEC Requests
Select this option if you require a new technology provision, service, or administrative access.
- Requesting shared drive permissions
- Setting up a shared department mailbox
- Ordering software installations or hardware upgrades
Complete the Required Ticket Fields
The platform will now prompt you for specific information. Therefore, ensure you fill out the required fields meticulously:
- Requester: Confirm if you are filing for yourself or on behalf of another colleague.
- Notifications: Add additional email contacts if you want peers to receive trackable email progress alerts.
- Categorization: Pick the accurate Category and Subcategory strings from the active drop-down menus.
- Details: Supply a descriptive summary of the problem, along with your exact campus building and office room number.
Finally, click the Submit button to route your ticket directly to the service queue.
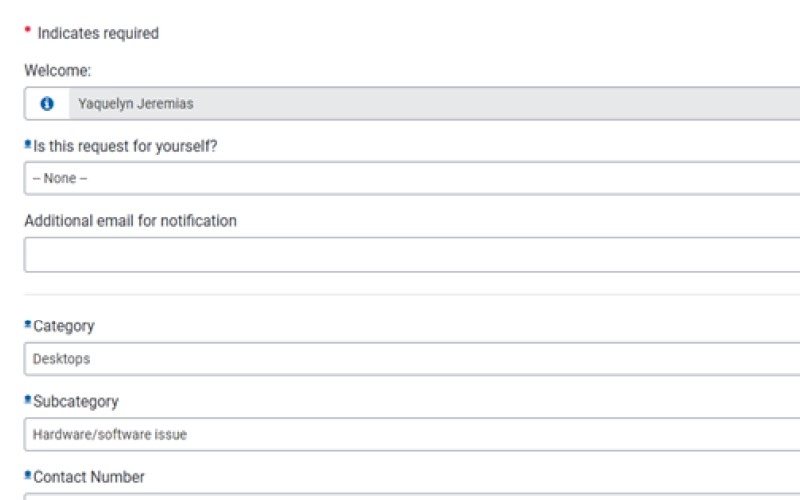 [Screenshot: Ticket Intake Form with text input fields]